Fool-Proof Methods To Reduce RV Condensation And Prevent Water Damage
We may receive a commission on purchases made from links.
Hitting the open road and exploring the wide world that lies beyond your local community is a fantastic way to bring incredible memories into your life. Road trip enthusiasts and occasional dabblers alike know there's no denying the magnetism of an adventure that centers on the journey. Additionally, joining the community atmosphere of RV life can make it even more memorable. Yet, all manner of potential hazards, pitfalls, and sore spots can come into the picture when talking about managing the travels and expectations along the road; RV living isn't always easy, after all.
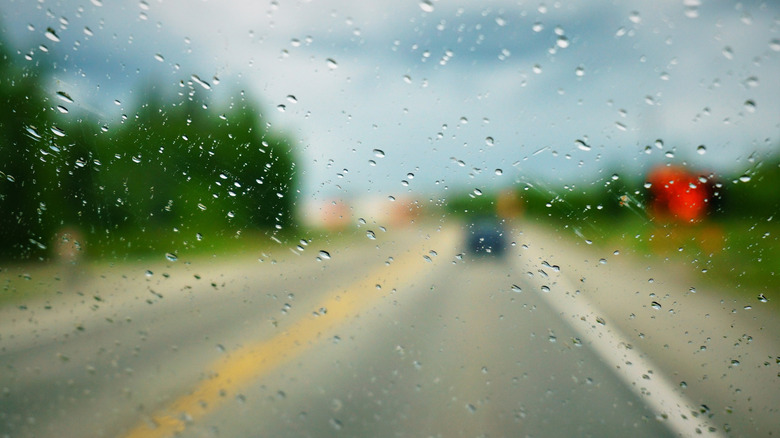
One issue, condensation, might start out as a small inconvenience, but too much moisture collecting on your windows can ultimately spiral into a huge problem. Explore spoke with Jason Epperson, the co-host of the RV Miles Podcast and YouTube channel, in an exclusive interview to explore this particular challenge. He told us about what to look out for when dealing with condensation issues and offered some tips on how to effectively combat this problem area. No matter the type of camper van or RV you explore the country in, moisture can ultimately serve as a potent adversary. Fortunately, allowing condensation to creep into the picture and ruin things is entirely avoidable with a few key strategies.
What causes condensation to form in RVs?

Combatting the effects of condensation in your mobile living space comes alongside other environmental needs like keeping your RV cool during the summer. It starts with an understanding of what causes the issue in the first place. "RV condensation occurs when there's a difference between the exterior and interior temperatures," Jason Epperson explained.
This is a fairly straightforward concept, and it's equally easy to see why people consistently get it wrong when attempting to tackle the problem. "When warm, moist air inside the RV hits cooler surfaces, especially windows, condensation forms," Epperson added. "This can happen in winter when it's cold outside and warm inside, or in summer when it's hot and humid outside and the air conditioning is running. A common misconception is that propane heat causes condensation. In reality, it's the even distribution of heat that can make condensation more noticeable, especially on less insulated surfaces like windows."
Therefore, RV owners will need to take steps to manage the moisture levels in their living space, no matter what the weather looks like on the other side of the window. A number of factors come together to create moisture in the air, so managing individual components can act as a starting point. But any single tool alone won't typically be enough to completely eliminate condensation and its after effects.
Window condensation 'is normal,' but you should be concerned if it spreads
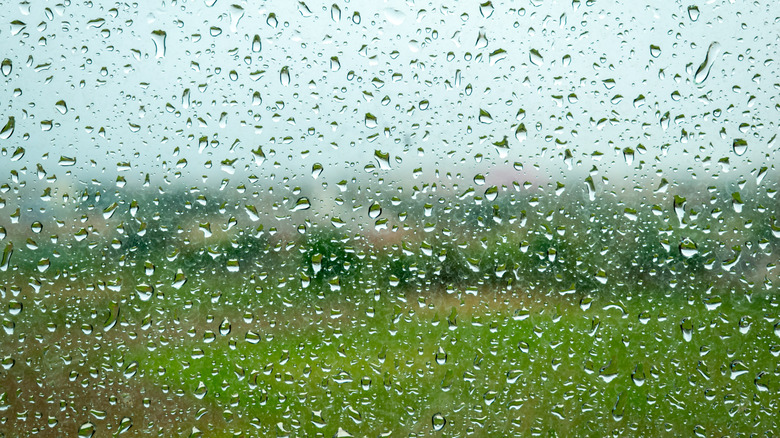
Once you gain a more comprehensive understanding of what condensation is and how it forms in your living spaces you'll immediately notice one particular trait about the phenomenon. "Condensation on windows is normal and not harmful," Jason Epperson shared. In fact, RVs and other mobile living solutions are designed with this process in mind. "RV windows have weep holes at the bottom, allowing any condensed water to drain safely outside rather than seeping into the walls." Yet, tackling the formation of too much condensation remains a key task alongside things like sprucing up the RV's living space to make it feel more like home.
Epperson also noted that condensation is a standard and natural feature of modern living, since all windows everywhere are susceptible to collecting condensed water droplets. However, allowing the condensation in your RV to reach extreme levels can become a serious problem if you aren't careful. "The real concern is condensation in other areas, which can lead to mold and mildew. Keeping a balance of humidity and ensuring proper airflow are key to maintaining a healthy RV environment," he expanded.
A healthy living space properly addresses moisture in the air

Jason Epperson was quick to point out that the after effects of moisture in an RV are the real problems worth addressing. A bit of condensation on the window won't hurt anyone, but leave it there and what comes next can be disastrous. "If condensation isn't managed, it can lead to mold and mildew growth, especially in hidden areas like behind furniture, in corners, or under mattresses. Over time, this can damage the RV's interior and affect air quality, potentially leading to health issues."
Indeed, much of the problem at play when it comes to condensation is the reality that it's not always easy to spot and treat. Condensation on the window is obvious, but it's only one visible aspect of a high moisture content in the air. Any time you notice condensation forming on your windows you'll want to take steps to address the problem. This helps manage the visible moisture in your living space.
Keeping your RV at a balanced air quality level will promote healthy living more broadly. However, there are numerous other tasks that should feature in your routine moisture management. Fortunately, Epperson also gave us some crucial tips to tackle the hidden moisture you can't see when out on an adventure in your RV.
1. Use a dehumidifier
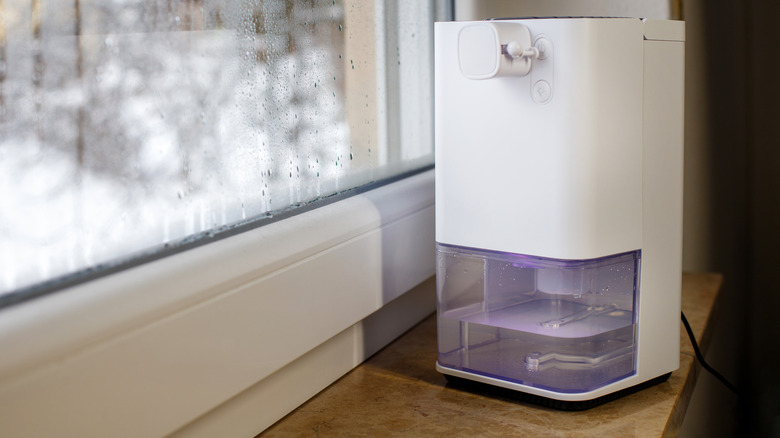
Jason Epperson's first tip is a simple one, and it delivers a largely inclusive solution to high moisture levels in your living space. He noted that a dehumidifier should often be your go-to when seeking to manage the impact of moisture and condensation in your RV. "A dehumidifier can effectively reduce moisture in the air, especially in winter," he offered, making them a crucial part of preparing your RV for a winter camping adventure.
Dehumidifiers come in a truly enormous range of options. There are portable models that run on rechargeable battery packs, meaning you can juice them up and place the units wherever they are most needed. These options are typically on the smaller end of the spectrum, which can act as something of a double-edged sword. On one hand, their slim stature makes them incredibly portable. But a smaller dehumidifier will struggle to tackle more extreme environments.
If you're consistently dealing with too much moisture in your RV, opting for a larger, plug-in model is likely a better solution. These feature greater power, allowing them to rid moisture from a greater volume of air, and quickly. They also come with larger tanks, giving you the ability to run many models through the night without the threat of a full tank that leads to an automatic shutoff and an outage in crucial moisture reduction.
2. Improve ventilation throughout the vehicle
Ventilation issues are a frequent source of moisture problems within any sort of living space. If your home or RV doesn't allow for the transfer of air back out of the interior spaces, you'll ultimately end up trapping moist air inside rather than giving it avenues of exit to help balance the environment. The process by which condensation forms is well-studied by scientists and researchers across academia. It's even a frequent project framework in K-12 educational settings, giving students a hands on display of how diffusion and other phenomena in our physical world operate.
"Keep airflow strong by using roof vent fans or cracking windows slightly. Running a vent fan even in winter can help reduce condensation," Jason Epperson suggested. If the moisture levels inside your RV are higher than those of the air surrounding it, opening a window or giving the indoor air other means of escape is crucial. This allows the moisture to naturally leave the space and transition into the lower pressure zones surrounding your mobile home. Opening your windows fully for a brief period can make a big difference, especially if you're in a windy area (following the German practice of "Stoßlüften" which can even help balance dry air, too). With no wind, fans that expel the air forcefully can be a major asset, quickly bringing your RV back into a state of relative equilibrium.
3. Utilize moisture absorbers
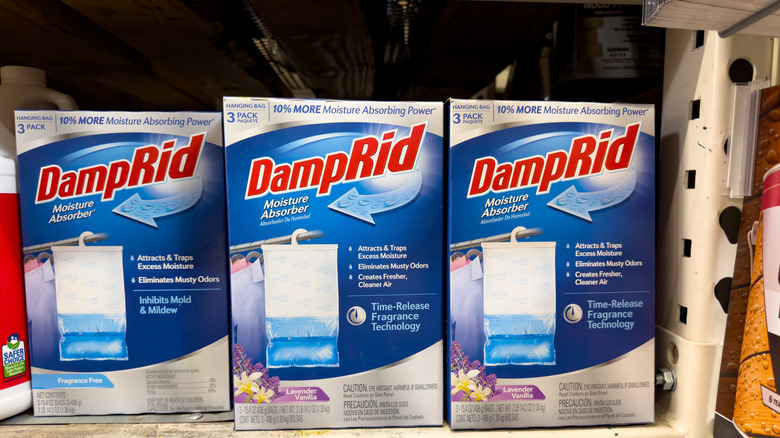
Low-tech options are also important resources for RVers dealing with heightened moisture levels. Moisture absorption functions as another crucial asset that can make a significant difference in your efforts to improve the environment." Place products like DampRid in corners, closets, and other small spaces where moisture can accumulate," Jason Epperson advised. DampRid is made of moisture absorbing crystals and comes in containers of various sizes.
In some situations, the outdoor air can be equally thick with moisture, and ventilation solutions won't get the job done alone. In dense environments, humidifiers may also struggle to remove moisture fast enough to make a noticeable dent in the air quality. This is where absorption solutions come into play. Absorbing the moisture and replenishing your products on a fairly robust schedule can help turn the tide. If your humidifier is struggling, this addition can be impactful right away. In particular, absorption tools play an important role in managing the nooks and crannies of your RV. As Epperson suggested, these deliver something of an analog dehumidification, and don't require any maintenance aside from occasional replacement.
Installing moisture absorbers in cabinets, closets, and elsewhere can provide a direct dehumidifying effect in the odd recesses that may not otherwise enjoy as robust an effect as the main, open areas. Your clothing and food preparation equipment require the same (or perhaps even greater) care as your common areas and bedrooms. If you don't take these recessed areas seriously when removing moisture from your living space, you might end up eating off of contaminated surfaces or wearing clothing that brings mildew into direct contact with your body.
4. Elevate your mattress

Your bedroom is a place of great importance. This is where you'll wind down for the evening and recharge for the next day of adventures. But a moist environment in this part of the RV can wreak havoc on your plans and wellness. It's common to focus on open areas of the RV when placing dehumidifiers and other tools, as this is where you'll spend most of your waking hours. But the living quarters support a healthy rest period and are equally crucial when considering environmental balance. If you don't have the tools necessary to bring enough dedicated dehumidification power to your bedroom, there are other options to consider.
Jason Epperson stated that the mattress can be a point of focus that makes a big difference. "Raise the mattress slightly off the platform to allow airflow underneath, preventing moisture buildup," he offered. Fortunately, RVers are frequently a crafty, inventive bunch. Building lift solutions to create this air gap doesn't have to be a major undertaking or extreme challenge. A simple frame made from easily accessible materials is all that it takes to impart this critical moisture-reducing space.
5. Wipe down surfaces on a regular basis
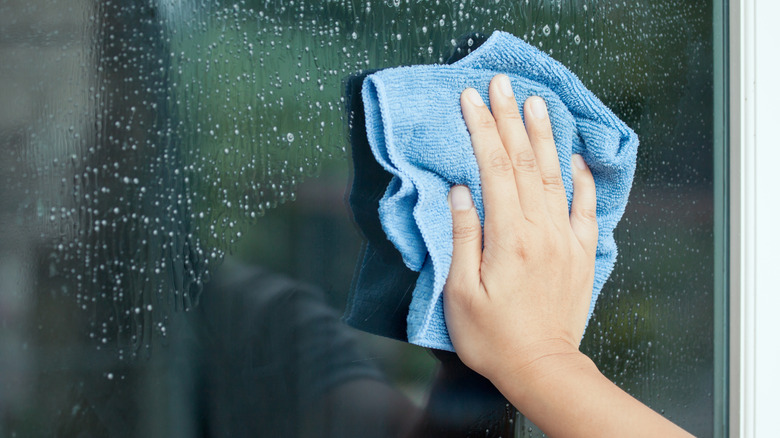
In terms of simple processes, Jason Epperson highlighted one of the most important and easy to enact approaches that all RV owners should take. "Regularly wipe down windows and other surfaces where condensation forms," he offered. This only requires a few seconds, and can make an outsized impact on your living area's overall environment.
When you see moisture collecting on windows (or elsewhere), wiping it off slows or even stops the process of mold and mildew formation. These elements come into the picture when moisture is allowed to collect on surfaces and remain there without interference. The longer standing water remains on the surfaces of your RV, the more likely it becomes that you'll end up dealing with problems much larger than just a humid environment. Wiping down your RV's surfaces periodically interjects a major roadblock into the process of potentially invasive growths developing in your mobile home.
Some mold might not pose an immediate or extreme health risk, but it can be difficult to differentiate. This means that RVers should treat all mold growth as the big deal it ultimately might be, even if the problem is a moderate one. Additionally, no one wants to look at mold growth around a window or on the ceiling. Not only can it be hazardous to your health, these kinds of issues seriously dampen the comforting environment that this recreational living space is meant to provide.
6. Maintain a balance with your interior humidity

Jason Epperson's suggestions all centered on a particular focal point. Taking steps to manage the humidity within your RV's living areas is all about balance. Moisture in the air is normal, and regardless of where you find yourself it will make its way into your cabins. Keeping moisture levels low is an important task that will maintain a healthy living space for you and your travel companions, but overcorrecting is also problematic. "Avoid over-drying the air, as air that's too dry can cause respiratory issues," he explained.
It might seem like a Catch-22, but maintaining healthy indoor air is really all about common sense. If your nose and throat feel a bit dry, it's a good sign of too much dehumidification. Turn off the unit and allow some of the moisture to reenter the environment. If the problem has become particularly extreme, you might even consider boiling a pot of water for a short period of time. This will thrust moisture back into the air directly, rather than waiting for a passive rebalancing to take place.
Follow your gut instinct in most circumstances and you're unlikely to go astray. However, a humidity meter can be a good investment. It's particularly useful for those who might have allergies or respiratory issues that make well balanced air quality a crucial requirement rather than just an indoor space conducive to healthy and happy living.
DIY solutions to combat condensation abound

RV owners frequently get creative with all manner of fixes and improvements. From secret weapons that banish bugs from the RV to stylistic personalizations and customized storage solutions, they are an industrious bunch. There's a definite need to understand the ins and outs of your individual vehicle, no matter its size, age, or condition. The same do-it-yourself spirit can be incredibly valuable when working through condensation fixes.
The silica gel packets that come with new shoes and other purchases can be a valuable item to hold onto. These can act as moisture catchers in your RV's tight recesses. Packaged up in contained little bags, they make a great addition to any RV space for those looking to tackle stubborn moisture issues.
Another major weapon that RV owners have at their disposal is baking soda. Pouring a small amount of baking soda into open top containers and leaving them in key areas around the space will do the same job as a store-bought moisture wicking product. Baking soda is a natural solution to all kinds of other needs, too, including odor elimination and cleaning.
Creative RVers can harvest their environmental humidity

It's worth noting that RVers who will be traveling farther afield and may not come into contact with supermarkets or other restocking options can use their dehumidifier as a makeshift water collection tool. For off grid living (even in short bursts), this kind of solution can be a particularly valuable introduction to your RV.
The easiest approach is to simply repurpose the collection tank of your dehumidifier. Connecting a dedicated hose to the unit and running the collected water through an additional filter and into a storage tank specifically designated for water you intend to use for cleaning, cooking, or drinking is a basic augmentation. It won't take long to make this DIY collector, and it can go a long way to providing you with clean, cheap water. Large dehumidifiers can produce gallons of usable resources on a daily basis in even low-moisture settings, so this can be a truly potent option to support your needs in just about any part of the country.
Another option is the use of outdoor collectors. Campers, hikers, and outdoor enthusiasts have been utilizing the simple plastic collector for generations. Creating a device that collects condensation in the same way that your windows do is easy. A piece of plastic is frequently all it takes. Adding a central dip into the collector and allowing moisture to run down toward a drip point located above your collection tank will give you a steady stream of moisture. Although, bear in mind that this approach will yield far less water than an active moisture generating tool like a retooled dehumidifier.