How To Take The Perfect Passport Photo At Home
Your passport photo is an essential part of your passport application, whether you're renewing your passport or getting one for the first time. Although you could spend some money to have your photo professionally taken at service facilities, such as the post office or a pharmacy, you can avoid this expense by taking your own passport photo. But you'll need to do so carefully.
With a decent camera and some basic cropping skills, taking your own passport photo isn't exactly difficult. That said, the U.S. State Department has very strict photo guidelines you'll need to follow. Mistakes related to head size and background color, as well as failure to meet other requirements, can result in passport delays.
To help ensure your passport photo is rejection-proof, we'll outline the State Department's basic photo requirements and list mistakes that commonly cause delays. Taking your own passport photo isn't difficult, but the DYI photo session will take some precision.
Basic passport photo requirements
To prevent any disruption to upcoming travel plans, you'll need to follow the State Department's guidelines closely. Passport processing delays are common, so let's not give the agency any reason to reject your photo. First, the digital photo should be in a JPEG format with a minimum resolution of 600 x 600 pixels and 55 kb.
Secondly, as you may know, the passport picture is 2 by 2 inches. Within this frame, your head should measure 1 to 1 3/8 inches from your chin to the top of your head. Submitting the wrong head size is a common mistake, so "get your head right." Fortunately, the State Department offers an online tool that crops photos to the correct size, but you'll need enough space around your head for this to work.
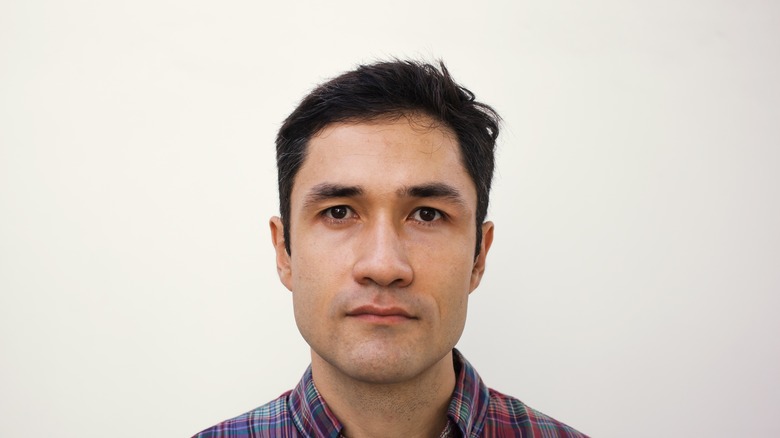
Now that it's formatted properly, you'll need to follow elemental guidelines closely. The picture must be a color photo taken within the last six months, and the background must be white or off-white with no items, textures, lines, or shadows showing. Looking straight at the camera, your face must be centered, clearly lit, and expressionless. While your upcoming trip may be exciting, this means no smiling. Also, the State Department discourages "selfies," so you'll need a tripod or someone to assist with your photo shoot.
Tips on rejection-proofing your photo
When taking a passport photo at home, you'll need to be handy with cropping, but that's as far as your photo wizardry should go. Do not use any filters on your photograph. Filters may look great on the 'gram, but the State Department isn't impressed. This applies to the background also. You'll need to find a bare wall or something similar, as you cannot filter a background into your photo.
Additional reasons photos are commonly rejected include smiling (or any non-neutral expression), closed or red eyes, blurry or grainy photos, as well as overexposure or underexposure. Also, nothing can cover your face. This includes your hair, a hat, and eyeglasses. As far as attire for your passport photo, you can wear whatever you'd like, except for uniforms or something resembling a uniform.
Before submitting your passport, you'll also want to make sure your photos aren't creased, smudged, or damaged in any way. As long you follow the agency's guidelines picture-perfectly, taking a passport photo could save you a bit of time and money.